WordPress SSL: Step-by-step Guide to Move WordPress Site from HTTP to HTTPS
Step-by-step instructions for migrating a WordPress site to HTTPS
Why Do You Need an HTTPS Website and an SSL Certificate?
An SSL Certificate (Secure Socket Layer) facilitates the encryption of data transmitted between a browser and a server. Encryption ensures that plain text information is converted to a random series of numbers and symbols. There are a number of reasons to move a WordPress site from HTTP to HTTPS. However, the following are the two most important reasons:
1. HTTPS SEO Impact using SSL Certificates
Starting from July 2018, Google initiated a change wherein all websites without an SSL certificate will be marked with a “Not Secure” message. Not only does this dissuade users from accessing or interacting with your website, but it will also drastically affect your ranking.
Furthermore, an HTTPS website also loads approximately 83% faster than a regular HTTP website. This lowers your bounce rate, increases user interaction, and gives you a considerable boost in terms of SEO ranking.
Google and other search engines have made it clear that they will give preference to HTTPS websites in their rankings, either directly or indirectly.
2. Building Trust
A lot of SSL certificates, called Extended Validation certs, also ensure that the name of the website is mentioned at the top of the browser, along with a safety padlock icon. The verified company name makes users trust the website more, and thus be more willing to offer personal information like credit card details, address, etc.
How to Enable SSL and HTTPS on WordPress?
There are two different methods to enable SSL and HTTPS on WordPress. Read on to find out about the three methods.
Method #1. Setup HTTPS in WordPress Using a Really Simple SSL Plugin
This is a simple method that can be used by beginners:
- Install the Really Simple SSL plugin.
- Go to Settings > SSL. Your WordPress site will automatically get HTTPS enabled.
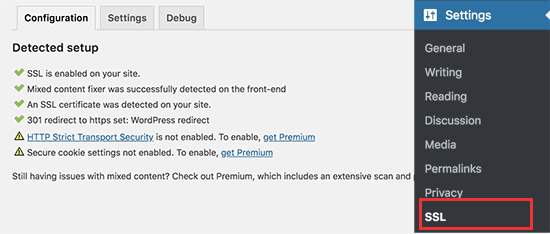
- This plugin automatically checks the SSL certificate, sets up redirects from HTTP to HTTPS, enables HTTPS to use in browsers, and fixes all website URLs still loading from an HTTP source. If you use this plugin method, you have to ensure that the plugin is activated at all times.
Method #2. How to Setup SSL Manually in WordPress?
This method should be attempted by skilled individuals or WordPress developers as it entails editing the WordPress theme and code files. You need to follow these steps:
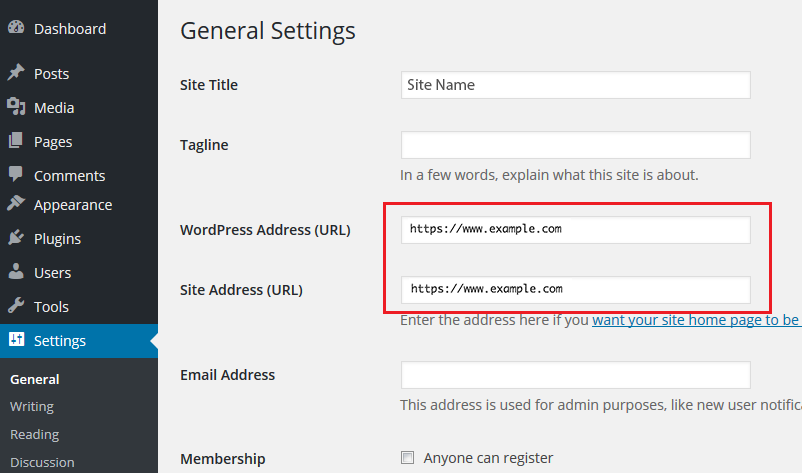
- Go to Settings > General, and replace the WordPress Address and Site Address URLs to “https”.
- Access your .htaccess file to set up WordPress redirects from HTTP to HTTPS.
Add following line of code to enable the SSL Certificate (HTTPS).
RewriteEngine On
RewriteCond %{SERVER_PORT} 80
RewriteCond %{HTTP_HOST} ^(www\.)?domain\.com
RewriteRule ^(.*)$ https://www.domain.com/$1 [R,L]
Method #3. Force SSL to Your WordPress Admin
Now you need to force SSL to your WordPress admin area by accessing the wp-config.php file and adding the text “define(‘FORCE_SSL_ADMIN’, true);”.
How to Fix SSL Errors?
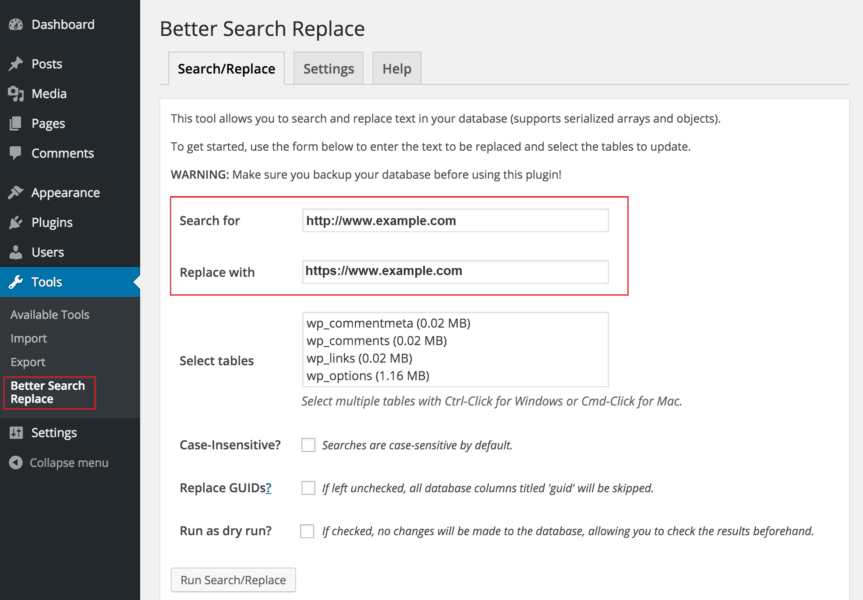
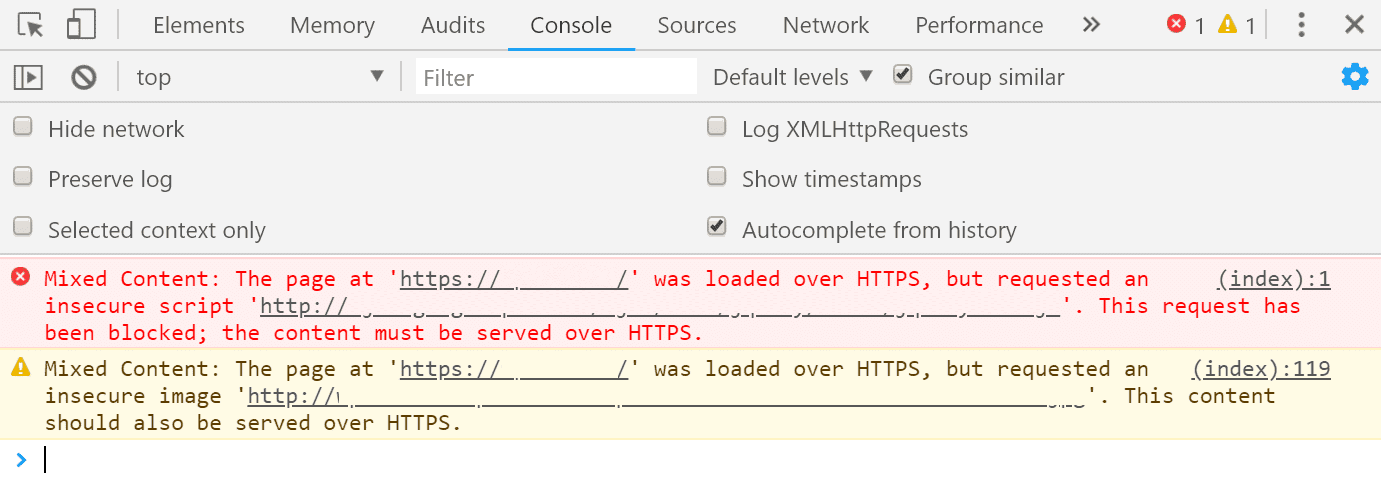
Once you have gone through all the previous methods, your website might still display a Mixed Content Error. These errors occur when there’s mixed content in your website — images, scripts, etc — that are still using the HTTP source.
In order to fix this, you can use an Inspect tool to figure out which files and data are still insecure. You can fix this in one of three methods:
- Use the Better Search Replace plugin to “Search for” all HTTP pages and “Replace With” their HTTPS alternatives.
- Look for HTTP sources in your WordPress theme using the Inspect tool and replace them with HTTPS.
- If the errors are being caused by some WordPress plugins, either disable them or contact their authors to fix the issue.
Re-submitting your HTTPS site to Google Search Console
Once you have migrated to an HTTPS website, you need to let Google know about the change because it considers both HTTPS and HTTPS to be different websites. You can do so through the following steps:
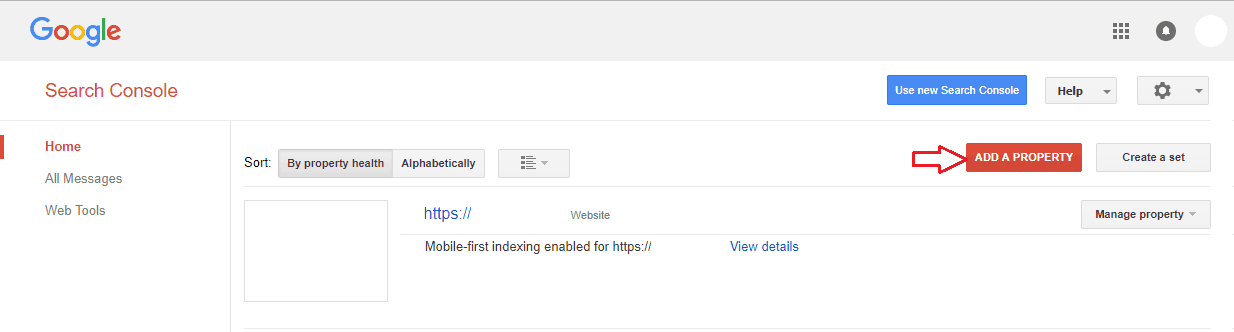
- Access your Google Search Console.
- Click on ‘Add a Property’.
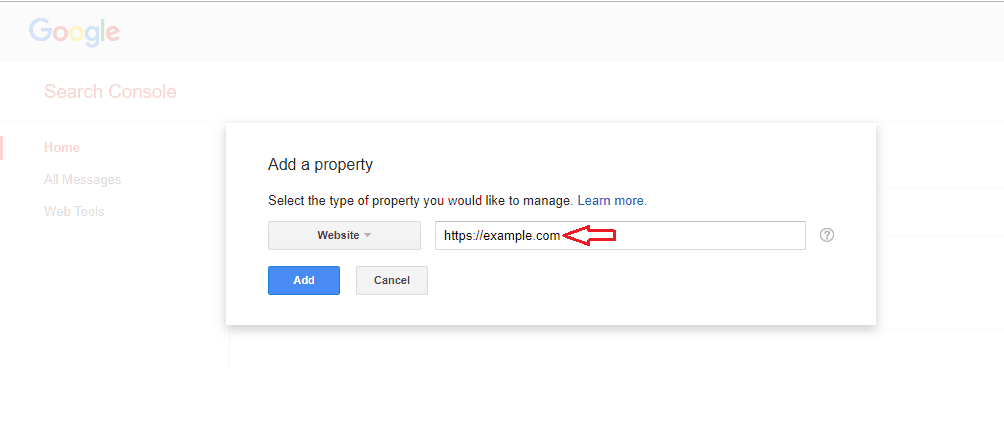
- Enter your website’s name.
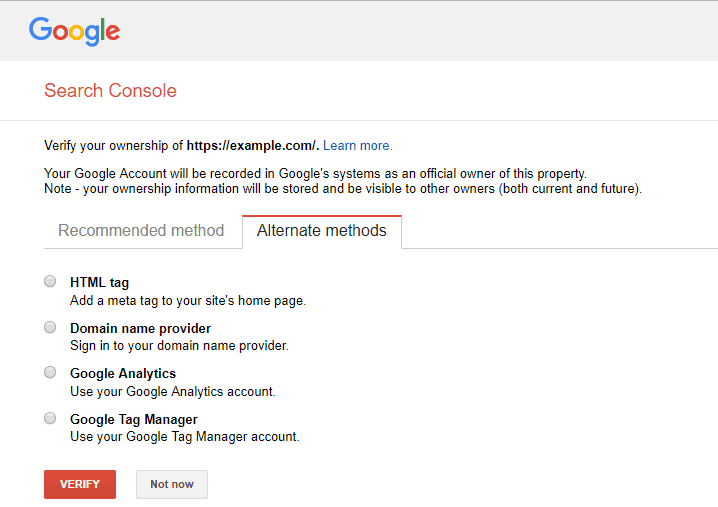
- Verify ownership of your website.
Conclusion
Once you’ve followed all of the aforementioned steps, you will have an HTTPS WordPress website. Depending on the SSL certificate of your choosing, you might even get the company name and the padlock icon in the browser address bar.